permission
Protected Node per Node Type Settings
Node Type extension
The Protected Node module adds a field set to the Node Type form that you edit under:
Administer » Content management » Content types
These additions are explained in detail below.
The main reason for adding this feature is to avoid seeing the field set on all the node edit forms. With this feature you can hide the form on all the node types that you will never protect with a password.
Protected mode for nodes of this type
This option let you choose how this node type handles the Protected Node capability.
Never protected
This means this node ...
Protected Node Password Field set
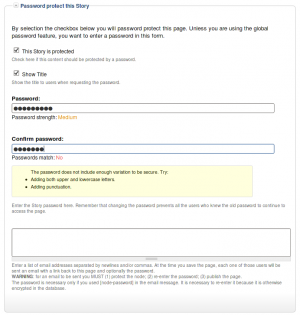
Once installed and properly configured, the Protected node module adds a field set in the node edit form (assuming the user has the corresponding permission: "edit any password" or "edit password <node type>".)
 This field set includes two flags, a password, and emails (optional.)
By default, the field set is closed unless you selected protected by default. Whether the field set should be opened or closed can selected in the node type settings.
The <node type> is protected
The first check box is used to password
Protected Node Global Settings
The protected node module has global settings found under:
Administer » Site configuration » Protected node
Protected node Statistics
The page starts with statistics to let you know how pages are protected on your website. All the counts include published and unpublished content.
- Total nodes — the total number of nodes on your website
- Unprotected nodes — number of nodes that do not have a password
-
Protected nodes — number of nodes that are current protected by a password
- Showing title — number of nodes showing their ...
Protected Node Permissions
The Protected Node module adds permissions to define who has the right to make use of the password feature.
- access protected content
This is the basic access permission for users. Users who are given this permission can access a protected node as usual, except that they need to enter the password to handle the node.
This is true whether they want to view, edit, delete the node.
- bypass password protection
Users with the bypass permission can access all nodes that are protected without having to enter the passwords. This is very handy for website administrators and
To Do List Known Issues
Cannot Assign User to To Do List item
When you first install the module, I wouldn't be surprised if you'd want to create a To Do List item right away and then assign the task to one or more users.
It won't work.
Before users can be assigned a To Do List item, you must give them permission to be assigned to such an item. This is done in the usual permission place: Administer » User management » Permissions. You may also want to create a new role of people who deal with To Do List items.
Actually, the To Do List module comes with many permissions so you may want to ...
Help for To Do List End Users
Introduction
![]() This page documents the usage of the To Do List module to end users (i.e. not how to install and setup the module, but how to create To Do List items, share them, mark them started/finished, etc.)
This page documents the usage of the To Do List module to end users (i.e. not how to install and setup the module, but how to create To Do List items, share them, mark them started/finished, etc.)
For administrative information check out the To Do List module help.
To Do List Global Settings
Global Settings
Global settings are found under Administer » Site configuration » To do list (admin/settings/to_do).
Only To Do List administrators can edit the Global Settings.
To Do List Installation
Basic To Do List Installation
Install the module as usual, generally under your sites/all/modules folder. On a Unix command line, you can use the tar tool like this:
  cd sites/all/modules
  tar -xf to_do.tar.gz
Then go to Administer » Site building » Modules and enable the To do list module.
To Do List Permissions
Permissions
Once installed the module offers several permissions under Administer » User management » Permissions (admin/user/permissions). These are include permissions similar to the Node permissions and some others. All the permissions are explained below.
Additional permission granularity can be obtained with the use of other modules as defined in the Extend To Do List.
Version 1.3 and newer
Known issue
The permission functions properly, no issue in that regard. However, the name of the permissions should be using "to_do" with an underscore to be 100% compatible
Extend To Do List with other modules
Extensibility
The To Do List module can be extend with the use of other modules. This page describes such extensions and what you can do with them.
Permissions
You may want to allow more people to work on your To Do List with better granularity in regard to who can edit which issue (instead of all of them) and who can view issues.
There are two modules you can use for this pupose. One lets you choose based on a set of taxonomy terms and the other lets you choose based on available roles.
In order to use a taxonomy with a set of terms, use tac_lite1
- 1. tac_lite stands for Taxonomy ...
